Facebook Groups have some of the best engagements on Facebook. Members are encouraged to post and comment, and are sometimes even rewarded for doing so! This is a space where people who don’t even know each other and would otherwise have no means to come in contact with each other are given a platform to meet and interact based on similar interests.
The amount of engagement that Facebook Pages used to have is now evident in Facebook Groups, which is why it is popular nowadays to create a group and connect it to your page. This can help improve engagement rate with the latter, and can even help increase the number of likes.
If you want to benefit from this as well, it would be smart to create a Facebook group for every Facebook Page you have, and of course, link them to each other. If you haven’t put one up already, here’s how to create a Facebook Page.
Now, let’s start building your group.
Create a Facebook Group Using Your Personal Account
Facebook Groups have become one of the core parts of this social network that they have now included Groups at the top navigation of the new Facebook design. It is possible to create a group both on your computer and on your phone.
Step 1. Click on Create a Group
There are a couple of ways to create a group on desktop. One is by clicking on the plus sign (+) on the upper right side, which is present whatever tab you are using. The other one is by clicking on the Group tab and then clicking on the Create New Group link on the left pane.
On mobile, you would have to go to the Group tab, and click on the Create button at the very top of the Facebook screen.
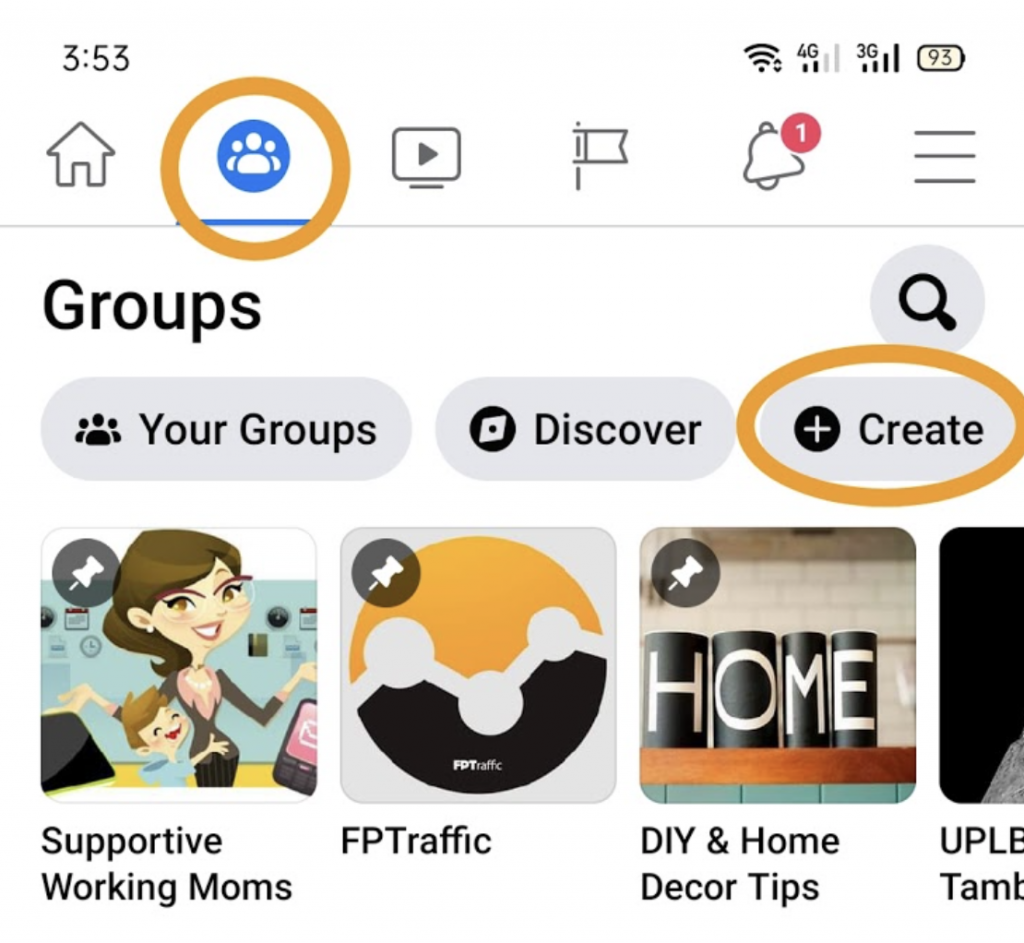
Step 2. Name Your Group and Set the Privacy Setting
A pop-up window will open up, requesting for only three details
- The group name
- The privacy setting
- Name of Facebook friends you want to add to the group.
The first two details are required, while the last one is not. Be careful when choosing a privacy setting, as a private group cannot be shifted to public later on. Click here to understand more about this policy.
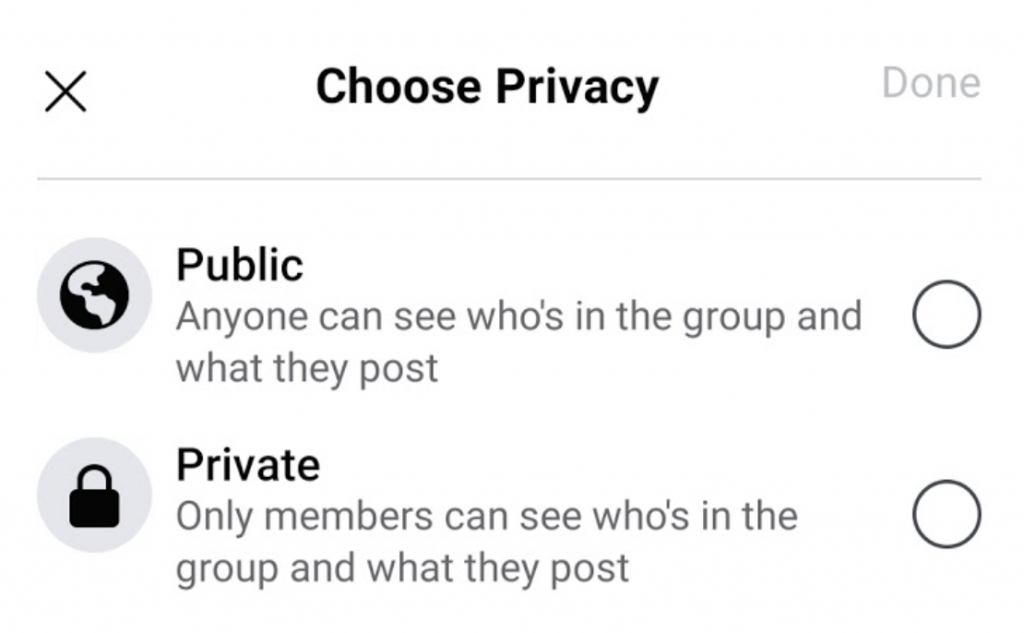
If you choose to make it Private from the get-go, you will be asked whether you want the group to be publicly visible for searches, or hidden from non-members.
On mobile, you will only be asked the first two details and will be asked to invite friends to the group on the next page. You can skip that part if you like.
Step 3. Add More Details to the Group Page
Essentially, your group is already up and running by the end of Step 2. However, in order to attract more members, you need to make the group page more appealing. The next recommended steps will actually be shown to you the moment you enter the group page.
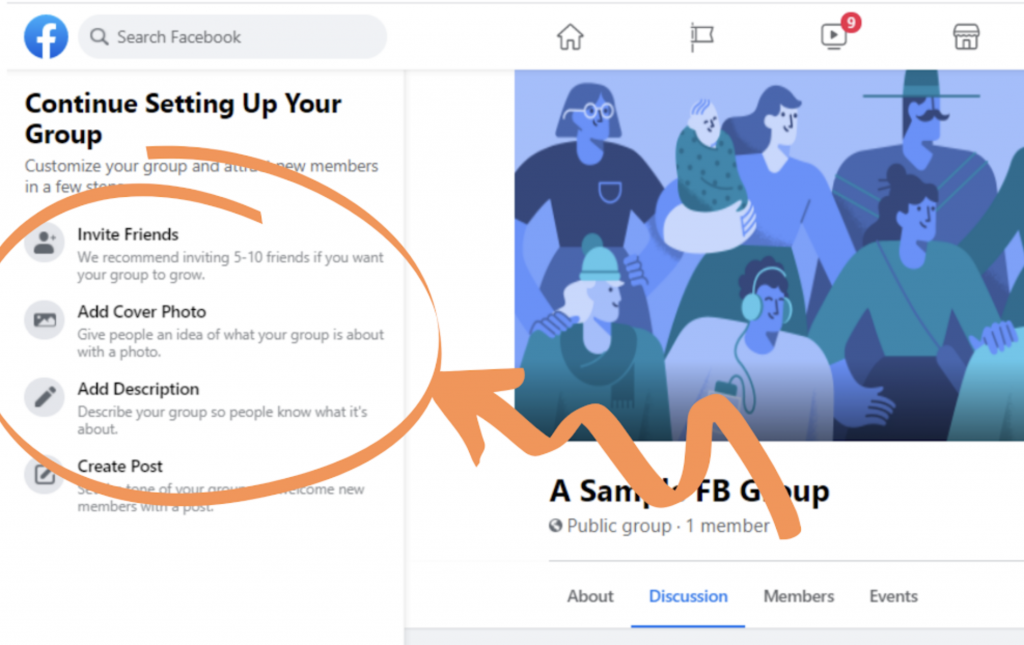
The next tasks are the following:
- Invite friends – you can invite your friends to be the first members of the group. Having 5 to 10 members is enough at the beginning.
- Add Cover Photo – the ideal image size for a Facebook Group photo is 1640 x 856 pixels.
- Add Description – this is one of the most important parts of the group. You need to provide possible members with an idea of what the group is all about, and what they should expect.
- First Post – if your page is a public one, this post (and all other succeeding posts) will be visible to anyone on Facebook who searches for your group.
On mobile, these recommended tasks are still part of the group creation. You can skip these steps for later, or you can get them over and done with.
The next step on mobile is your group description.
Finally, you’ll be asked for the first post. The first post will serve as a welcome post that the first members will see.
And you’re done! The next steps will then be to build your group by inviting like-minded individuals, and improving the rules when it comes to sharing and commenting within the group.
Connect Your Facebook Group to Your Business Page
It is possible to connect your Facebook Group to an already existing Facebook Page. It’s actually pretty simple.
On your Group Page, have a look at the left pane. Scroll down until you reach the bottom and see the Settings link.
On the next page, scroll down to the very bottom, until you arrive at the Advanced Settings part. You will see the option named Linked Pages. Click on the edit (pencil) button.
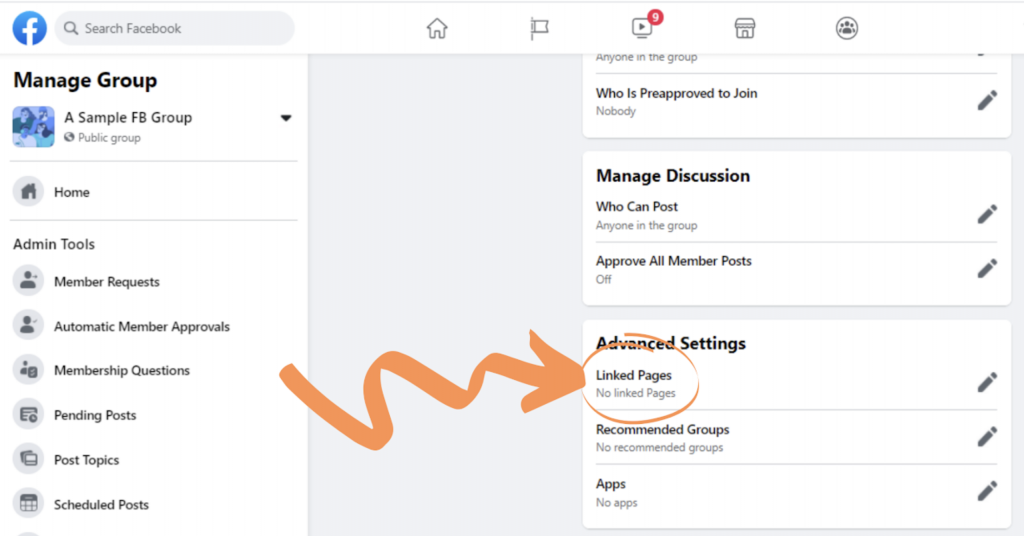
Choose from the list of pages you have available, and that’s it! You have successfully linked your Facebook Group to your Page.
Create a Facebook Group Using Your Facebook Page
Facebook has recently launched its updated design, hence navigating around the platform can be a bit tricky right now. Creating a Facebook Group directly from your page is not as easy at the moment, as the option is currently unavailable. You would have to build one from your personal account and then link it later on.
However, if you have connected your business page to a Business Manager account, you’ll be able to see the Group creation option when you access the Page from within the Business Manager.
After clicking on Create Group, you will be asked to add a group name and set the privacy. Please follow the same steps above when building a Facebook Group using your personal account.
Final Thoughts When Building a Facebook Group
Whichever way you prefer to create a Facebook Group, the important thing is that you can arrive at the same result.
Because of an FB Group’s high engagement rate, you can interact with individuals here more than you can on your Facebook Page. There is virtually no disadvantage to creating and building a group side by side with your page. It all comes down to the amount of effort you can put into managing both.
This is where FPTraffic can help you. Aside from being able to find and schedule content for your Facebook Page, you can do the same for your Groups.
All you have to do is to link your Group profiles within your FPTraffic dashboard and then add the App to the FB Group using the Group Settings.
Once you have completed this step, you can start searching for content and scheduling them in your FPTraffic dashboard. This can make the management of both your pages and groups easy as a pie!




Members join like comment follow